Land Revision Setting
Managing General Revision Settings
The General Revision Settings are essential in the proper computation of real property assessments. The setting includes the Schedule of Fair Market Value and applicable adjustments. The SFMV must be approved by the Local Government before it must be adopted for implementation. An associated revision setting must be created for every General Revision implemented and mandated by the LGU.
Land Revision Setting
This is the setting that controls the assessment computation of land property. Included are settings for Assessment Levels, Land Classification and Unit Values, Land Adjustments and Land Actual Use Adjustments. It is imperative that the actual schedule values from the approve ordinance must be followed to avoid unnecessary administrative complications.
On the Main Menu explorer, navigate and double-click Settings -> Assessor -> Land Revision Settings item.
On the list page, click on
Newto open the New Revision Setting page.
- Enter the Revision Year and click
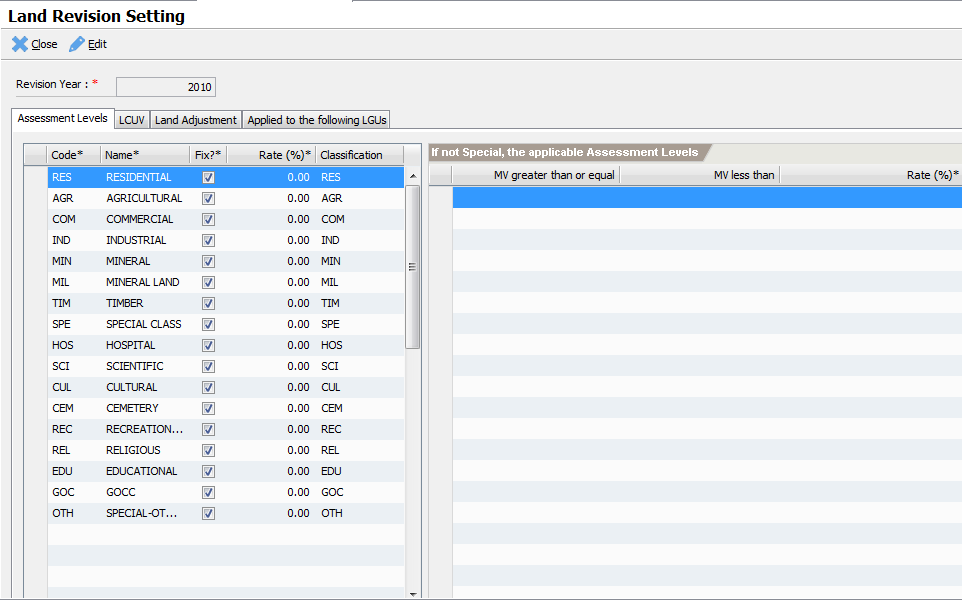
Save. After successfully saving the record, the main screen is displayed. The main screen is categorized into several tabs. The tabs are the Assessment Level, Land Classification and Unit Values (LCUV), Land Adjustments and Applied to the following LGUs as shown below.
Assessment Levels
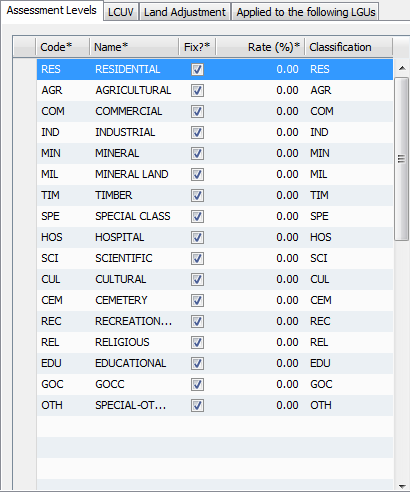
The Assessment Level tab defines all applicable assessment rates for each actual use. The rates are used to compute the assessed value of a property.
To add a new assessment level, click on the “Code” column of the last empty row.
Enter the following information by moving from column to column:
Code – a required assessment level code
Name – a required assessment level name
Fix? – indicates whether the rate is a fix amount or based on a range of values.
Rate – the assessment level rate expressed as percentage
Classification – a lookup that references one of the standard property classifications
Commit the record by moving the cursor to the next row.
Assessment Level Ranges
In cases where the assessment level is not “Fix”, then range entries must be defined. The range is based on graduated market values with corresponding assessment rates.
To enter a new range, click on the MV less than column of an empty row.
Enter the upper range value. If this is the last value, enter zero (0) as the max value. The zero value indicates infinite number. Pres Enter to commit the entry.
Enter the rate in percentage and then press Enter.
Move the cursor to the next row to commit the record.
Repeat steps 1-4 and enter all ranges.
Land Classification and Unit Values (LCUV)
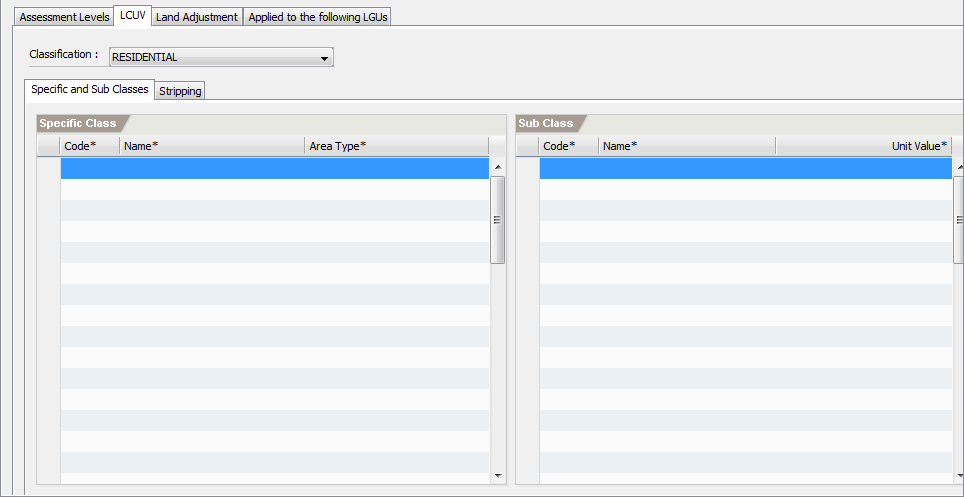
The LCUV is the setting that defines the market values for each classification of land. The market values must be taken from the approved schedule as mandated by the local revenue code. The LCUV is divided into two main categories, namely: the specific classes and the subclasses. Specific class is a specific “grouping” of land types per classification. Examples include Banana Land and Coconut Land for the agricultural classification. The Sub-Class defines the different class rating of the specific land such as 1st class, 2nd class and etc.
Specific Classes
Select the type of classification from the Classification combo box.
On the specific class list, click on the Code column of the first empty row.
Enter the following information:
Code – required specific class code
Name – required specific class name
Area Type- the type of area for this specific class. The valid values are HA and SQM.
After entering the Area Type, press Enter to commit the item.
Repeat steps 1 – 4 to enter all specific classes.
Sub-Classes
Select a Specific Class you want to add sub-classes.
On the Sub Class list, click on the Code column of the first empty row.
Enter the following information:
Code – required subclass code
Name – required subclass name
Unit Value – the approved unit value for this class.
After entering the Unit Value, press Enter to commit the item.
Repeat steps 1 - 4 to add all sub-classes.
Strippings
Stripping levels can also be associated on a classification. Stripping normally reduces the applicable unit value of the property thereby reducing the computed market value.
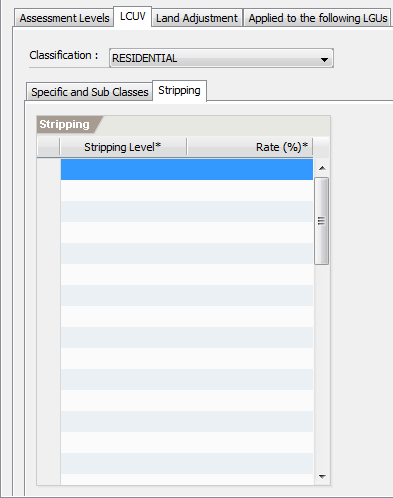
To define stripping levels for a classification
Select the classification to add stripping from the Classification combo box.
On the Stripping list, click on the Strip Level column of the first empty row.
Enter the following information:
Stripping Level – the strip level no.
Rate (%) – the stripping rate in percentage.
After entering the Rate, press Enter to commit the item.
Repeat steps 1 – 4 to add all stripping levels.
Land Adjustments
The land adjustments are additional adjustments applicable to the assessment of property. Adjustment can be represented as a simple formula or it may require additional parameters. A parameter information must be created first before it can be used as a formula. See RPT Parameters on how to create new parameter values.
To create a new adjustment:
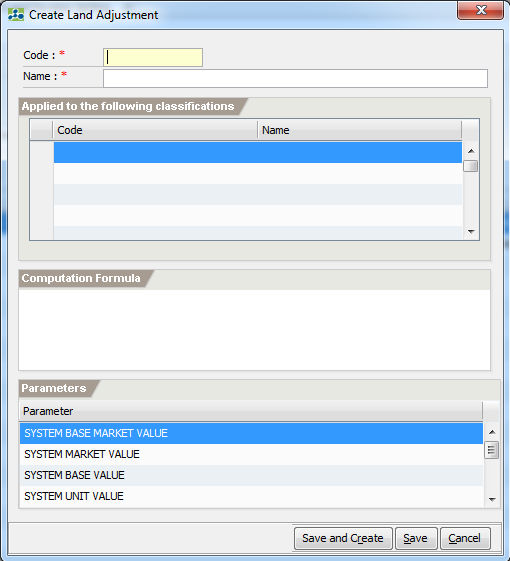
- On the Land Adjustment tab, click on
New.
Enter the following information:
Code – a required adjustment code
Name – a required adjustment name
On the Applied to the following classifications list, click on the Code column of the first empty row.
Lookup the classification that this adjustment is applied to. Repeat the process to add all classifications.
On the computation formula, enter the formula to compute the adjustment. To use a parameter, double click the parameter from the Parameters list to insert its parameter name.
Click Save to commit the record or
Save and Createto commit the record and create a new one.
Applied to the following LGUs
ETRACS now supports cases where different revision settings are applicable to specified LGUs. Inorder for a setting to be useful, the LGUs must be added to the list. Use the Search LGU field to lookup and add and LGU to the list.
